Installing the Control Panel
NOTICE

Damage to the system from drilling dust and loose parts!
Drilling dust, splitter and loose parts may damage the machine.
- ▶Before carrying out drilling or installation work, cover the affected area of the machine with film or paper.
- ▶After installation work, check that the bolts are screwed tight.
To install the control panel in the operator panel, you need the optional installation kit (order number 133 459).
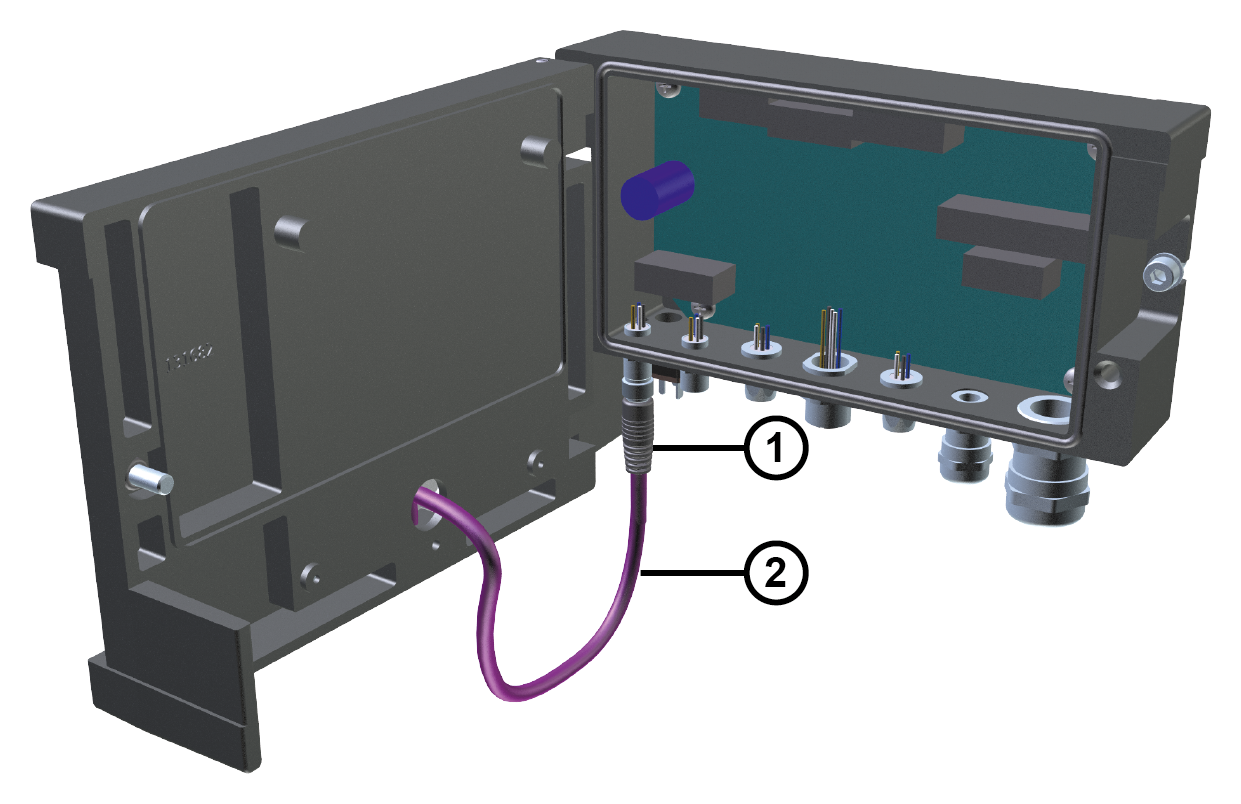
- Disconnect the plug ① on the connecting cable ② for the control panel from the controller.
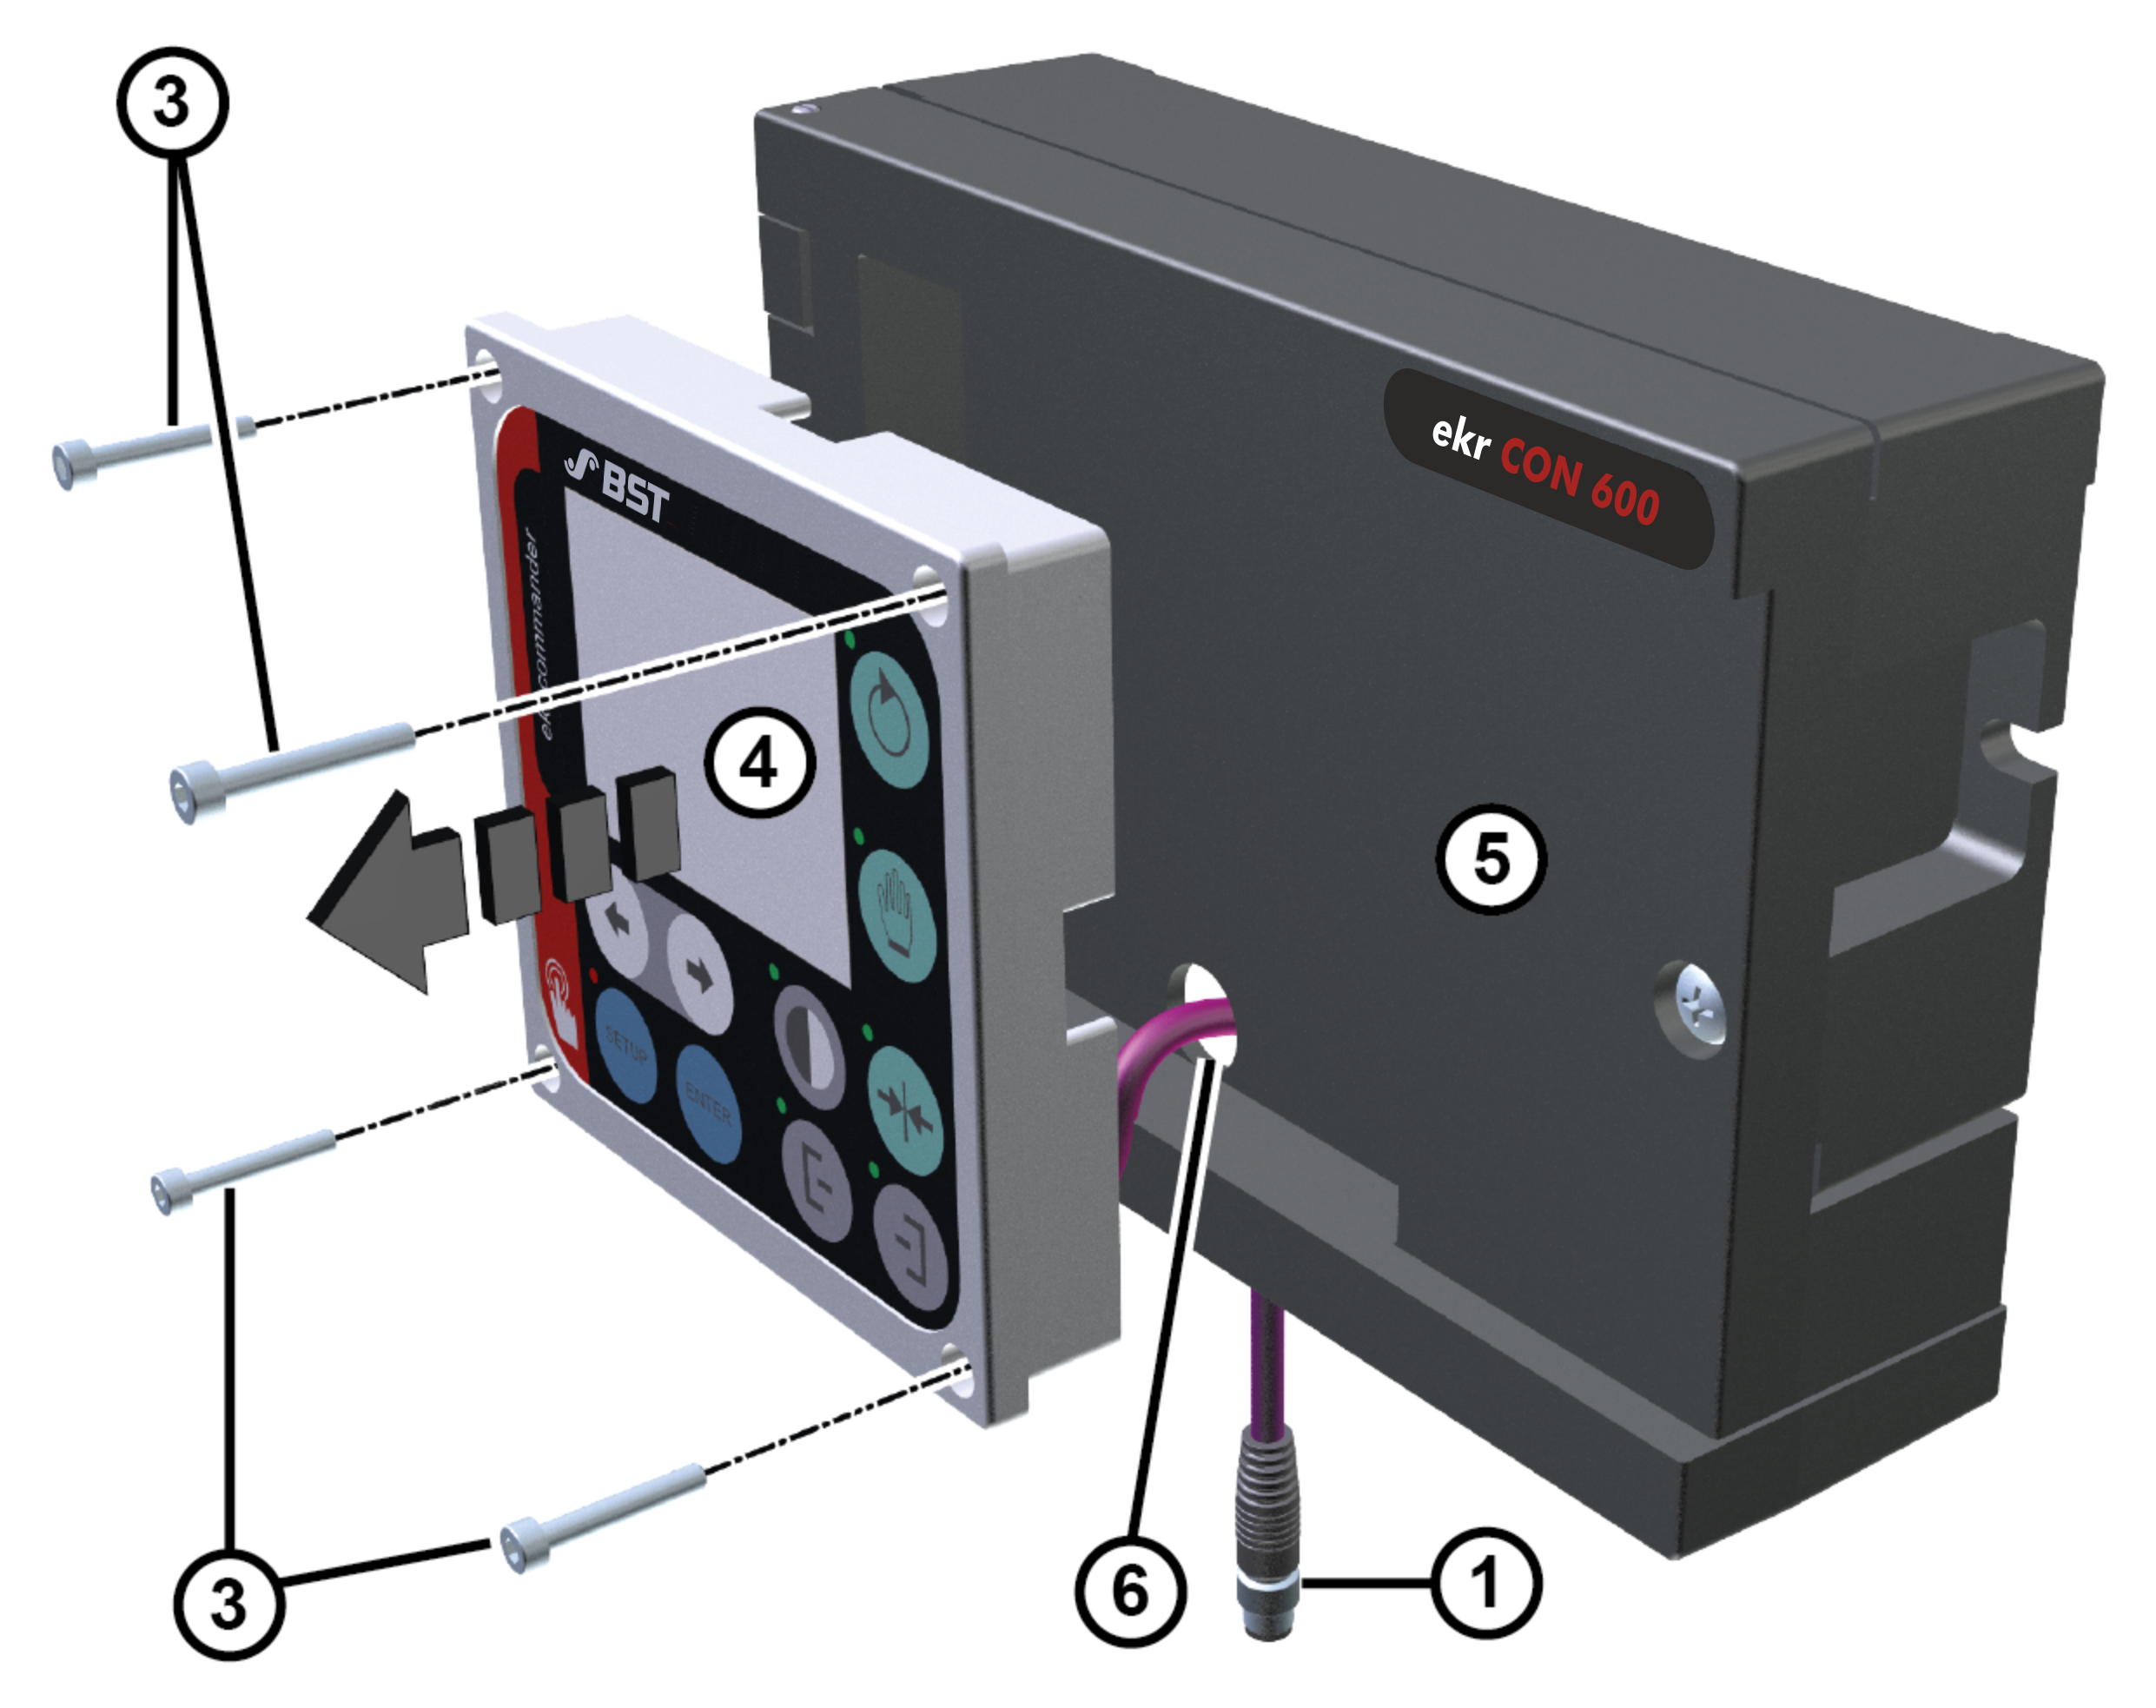
- Unscrew the four securing screws ③ of the control panel ④ and store in a safe place. These screws are required for the wall mounting of the control panel.
- Pull the control panel ④ off forwards from the controller ⑤. In doing so, pull the connecting cable and the plug ① carefully through the hole ⑥ in the controller housing.
- Make an installation cut-out (see Installation Cut-Out).
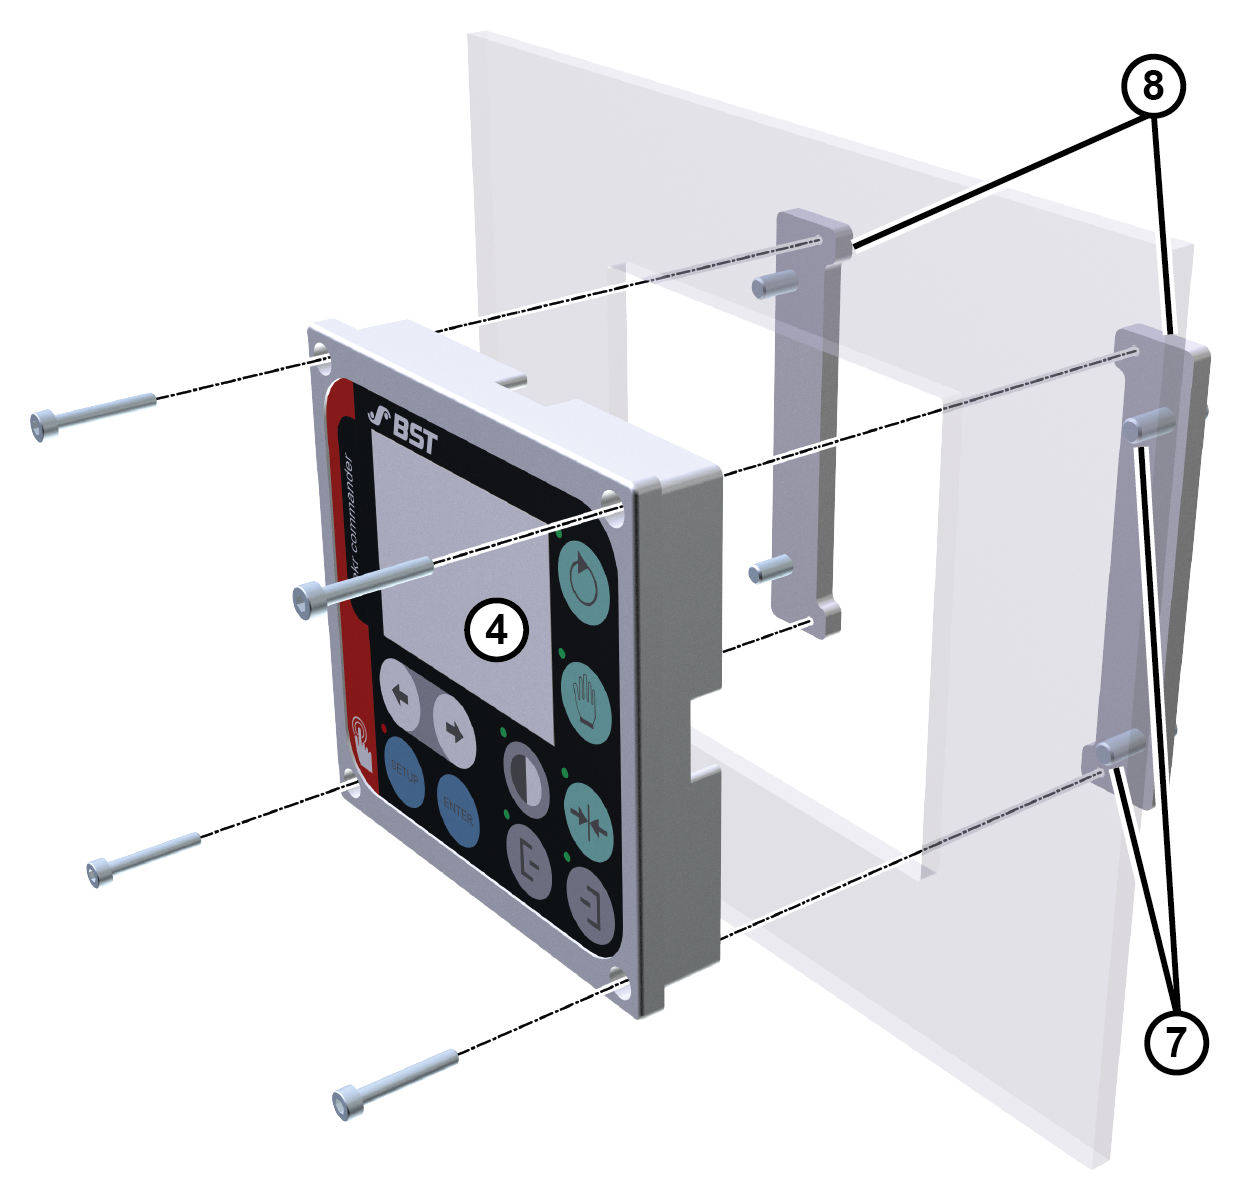
- Carefully push the control panel ④ into the installation cut-out.
- Use two screws to screw the two securing plates ⑧ (part of the installation kit) onto the rear of the control panel ④. The four hexagon socket screws that secured the control panel to the controller when the unit was delivered can be used for this.
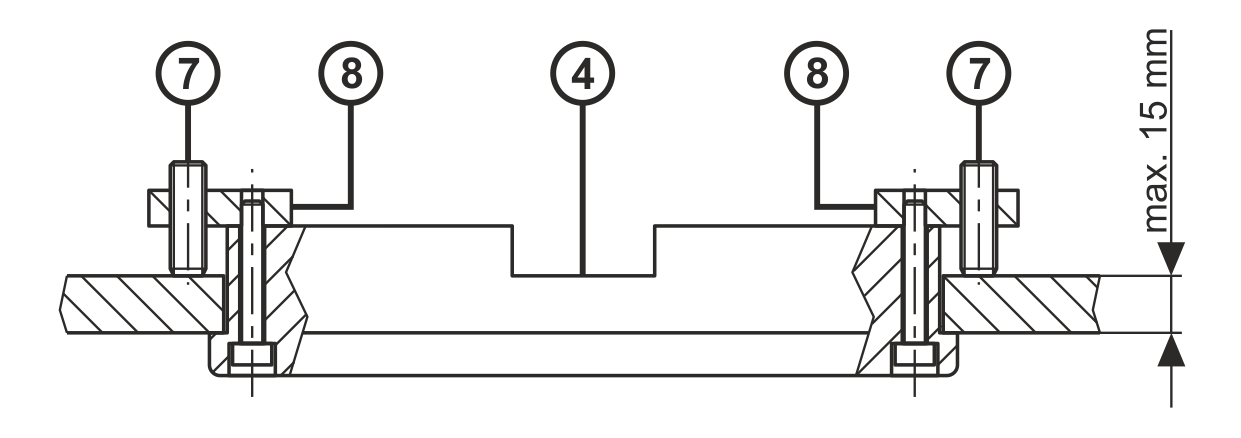
- Screw the four threaded pins ⑦ into the securing plates ⑧ until the control panel ④ is held firmly in place.
- Use the optional cable extension to connect up the control panel to the controller (see Cable Extension).
- Plug the cable extension plug into socket X100 on the controller.
